Creating business cards doesn’t require expensive design software or extensive design expertise. Microsoft Word provides a straightforward solution for crafting and printing professional-quality cards.
Whether you need a quick design using user-friendly templates or prefer to create custom cards from scratch with the Table tool, Word has the tools you need.
Moreover, Word integrates seamlessly with other Office applications like Excel and Outlook, making it simple to import contact information or logos. This not only saves time but also ensures accuracy. You can even customize each card for specific events or people.
This guide will walk you through creating simple business cards in Microsoft Word using both templates and tables.
How to create a business card in Microsoft word?
Creating a business card is simple with MS Word. You can use its templates for an easy design or create one from scratch with the Table tool.
Here’s how to create a visiting card using a template in Word:
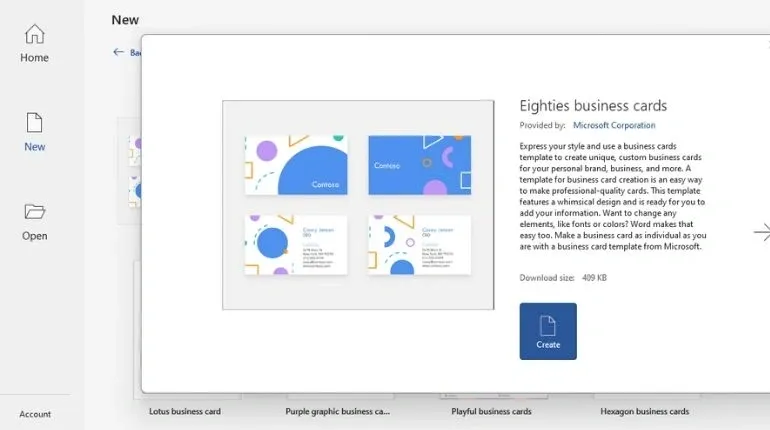
Step 1: Pick a template
Open word: Launch Word from your applications folder or Start menu.
Select a template: Click on ‘File,’ then ‘New,’ and search for ‘business card.’ Once you find a design you like, click on the ‘Create’ icon to download the template into your Word document.
Step 2: Add your information
An essential part of designing your business card is choosing the right content. This includes adding important business card information such business name and the most effective ways for others to contact you.
- Name: Ensure your name or company name is prominently displayed in a large font.
- Personal tagline: Add a tagline that summarizes your service, like “Content creation for all” or “Sports consultant for athletes.”
- Logo: Incorporate a logo that reflects your industry and personality.
- Phone number: Include your phone number for easy contact.
- Email: Provide your email address for follow-up.
- Website: Add your website to showcase your portfolio if relevant.
- Social media: List your professional social media profiles to maintain connections and highlight your work.

Step 3: Customize your business card
Customizing text elements in word gives you the flexibility to enhance your business card design creatively. You can easily change fonts, adjust colors, and modify sizes to fit your style.
If you want to personalize your card beyond the template, tweak the fonts, colors, and shapes to match your brand.
- Add shadows: Apply shadows to shapes by right-clicking and selecting “Format Shape,” then adjust options in the formatting panel.
- Adjust colors: Switch from default warm colors to cooler tones by selecting the “Design” tab, clicking “Page Color,” and choosing a color from the palette.
Related: How to design a business card
Step 4: Insert your logo
Updating your logo is an important step in personalizing your business card:
- Click the placeholder: Select the existing logo in the template to replace it.
- Insert your logo: Upload your own logo, making sure it fits well within the designated space.
- Resize carefully: Adjust the size of your logo so it remains clear and professional, avoiding distortion.
Step 5: Proofread your visiting card
Carefully review your business card to eliminate any typos or spelling mistakes. An error-free card reflects professionalism and attention to detail, setting the stage for positive first impressions.
Given that your business card often makes the initial impact, a well-proofread card ensures that you present yourself and your brand in the best possible light, paving the way for successful connections and opportunities.
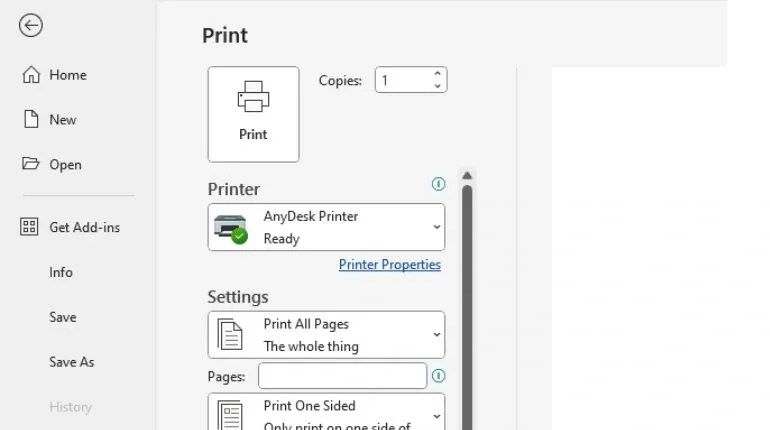
Step 6: Print your card
Print your business cards on high-quality paper or get them done professionally. If you’re printing at home, use sturdy white or off-white cardstock and choose a finish, like glossy or matte. Ensure your printer can handle the paper type; check the printer’s manual for details.
If you want a more polished result, pick card stock with a clean edge rather than perforated. Test your design on regular paper before using card stock. If your printer can’t handle card stock, you can have your cards printed at a professional printing service.
Step 7: Cutting your business card
After printing your business cards, use a precision cutting tool to trim them. Each sheet usually contains several cards, and using a paper guillotine or precision cutter will ensure clean, straight edges.
Scissors are not recommended for this task. Many print shops offer cutting services if you don’t have the proper equipment.
Be aware that business card sizes vary by country. For example:
- In the U.S. and Canada, the standard business card size is 3.5 x 2 inches.
- In the UK, it is 3.3 x 2.2 inches.
- In Australia, it measures 3.6 x 2.2 inches.
How to create business cards in MS word without a template?
Creating business cards in Microsoft Word without using a template involves a few steps. Here’s a straightforward method to create a visiting card in MS word with a table:
Step 1: Setting up the document in word
To start a new business card design, select “New” to open a blank document. For a custom design, use the Table tool to simplify the process.
Go to the “Layout” tab and adjust the margins by choosing “Narrow.” This will reduce the default margin size, providing more space on the page for your business cards.
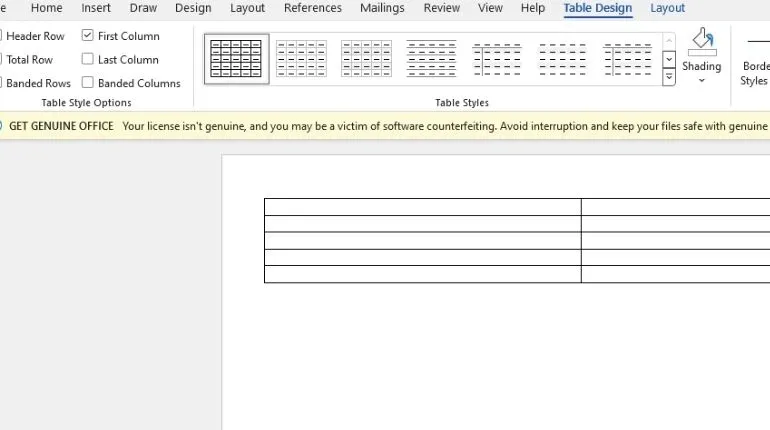
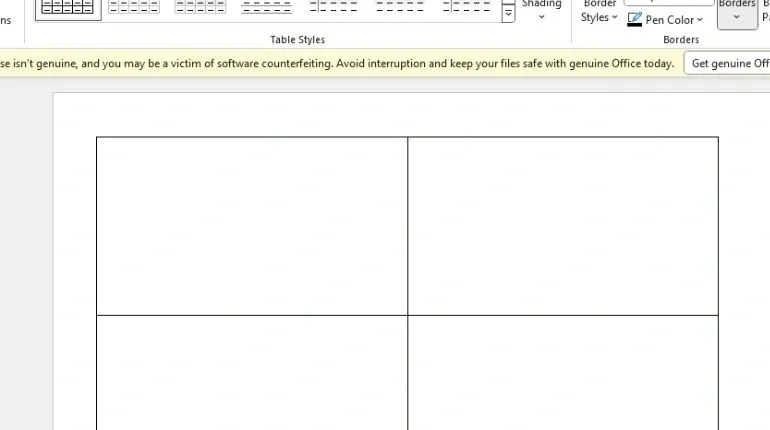
Step 2: Create a table
Insert a table: Navigate to the “Insert” tab, click “Table,” and choose a 2×5 grid to create a layout that fits 10 business cards on a single page.
Step 3: Adjust table alignment
Access table properties: Right-click the selection crosshair in the upper-left corner of the table and select “Table Properties.”
Center the table: In the “Table Properties” window, set the table alignment to center to ensure your cards are evenly spaced and properly aligned on the page. Adjust other settings as needed for your design.
Set the row height: Go to the “Row” tab, select “Specify height,” and enter 2 inches. Set the measurement option to “Exactly” for precise dimensions.
Understand card size standards: Be aware that business card sizes differ by region:
- In the US and Canada: 3.5 x 2 inches.
- In the UK: 3.3 x 2.2 inches.
- In Australia: 3.6 x 2.2 inches.
Adjust the column width: Open the “Column” tab, select “Specify width,” and input 3.5 inches, choosing “Inches” or your preferred unit of measurement.

Step 4: Review your table
- Check table alignment: Ensure the table is correctly divided into ten evenly sized cells. If necessary, adjust the bottom margin by an extra tenth of an inch to make everything fit.
- Lock column width: Right-click the table crosshair, choose “AutoFit,” and select “Fixed column width” to keep the table dimensions stable as you fill in details.
- Add a second page: For double-sided cards, copy the table and paste it onto a new page in your document. This will allow you to design the back of the business card.
Step 5: Add your information to the first cell
Start by adding all the essential details to the first table to create the layout of your business card. You can customize the card further by using formatting tools to adjust images, text, and colors, making the design unique to your style.

Step 6: Proofread your visiting card
Check your information carefully before copying it to other cells. Fix any errors now to avoid having to edit each cell later. For added accuracy, have someone else review your cards before printing.
Step 7: Paste and format card information
Select cell contents: Position your cursor at the bottom-left corner of the cell until it changes to a diagonal arrow. Click to highlight the cell’s contents.
- Copy the data: Press Ctrl+C (Windows) or Cmd+C (Mac) to copy the information to your clipboard.
- Paste into other cells: Click on the next cell and use Ctrl+V (Windows) or Cmd+V (Mac) to paste the copied content. Repeat for each cell as needed.
- Keep it simple: Focus on essential details such as your company logo, name, email address, physical address, website, and role. Avoid overcrowding the card with excessive information.
Step 8: Print your card
Use durable card stock: Choose business card stock to ensure your cards are sturdy and professional. Choose stock that separates cleanly rather than perforated sheets.
- Proof your design: Print a test page on regular paper first to check your design before using the actual card stock.
- Consider professional printing: If your printer can’t handle card stock, take your design to a print shop for high-quality printing on your preferred paper.
What are the common issues and fixes for business cards in MS Word?
- No templates available: Ensure you have the latest version of Word or find downloadable templates online. Alternatively, design your own with Word’s built-in tools.
- Formatting issues: Verify and adjust page margins. Choose readable fonts and sizes for clarity.
- Printer problems: Confirm that your printer supports the paper size and type you’re using. Also, check and select the correct printer settings in Word.
Conclusion
In summary, making professional business cards in Microsoft Word is easy, whether you use a template or start from scratch. We’ve gone over important steps like picking the right paper size, adjusting printer settings, and setting margins.
Following these steps will help you create business cards that look great and print smoothly, leaving a positive impression on your contacts.
Answering your questions
For the best results when printing business cards at home, use high-quality cardstock. Choose a business card stock that weigh between 80-110 lbs (200-300 gsm) for a durable and professional feel. Make sure the cardstock is compatible with your printer.
Yes, designing double-sided business cards in Word is possible. To do this, you’ll need to set up your document with two separate pages—one for the front and one for the back. Ensure you use the correct page layout and adjust your printer settings to print on both sides of the paper.